
Good morning everyone. It's Kayla (keepscrappin) here with a little How to tip for you today. I'm going to show you how to use the stroke command in Photoshop Elements to make a quick little photo mat for your layout. I'm using PSE 7.0, but these instructions will work in other versions of PSE and PS with slight modifications.
Here's the layout we'll be working on today.
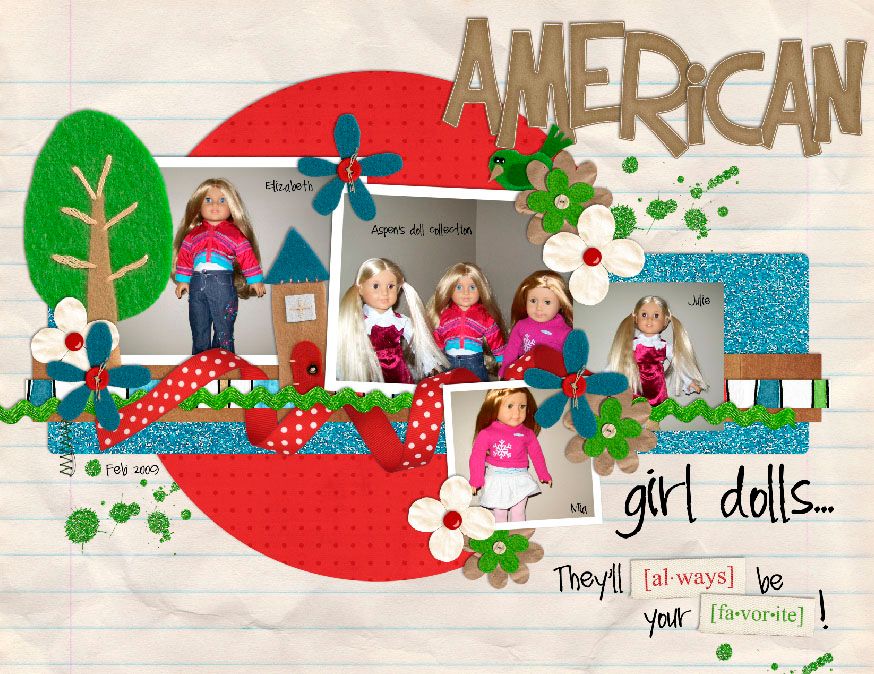
As you can see I have one photo left that still needs a mat. Here's how to add it.
First you'll want to make sure your foreground color is the color you want for your photo mat.
Type D to get the chips to the default of black and white.
Type X to make white your foreground color.
Your color chips should look like this.

Next, you will want to go the layer that needs the mat. Select that layer in the layers palette as shown in the image below.
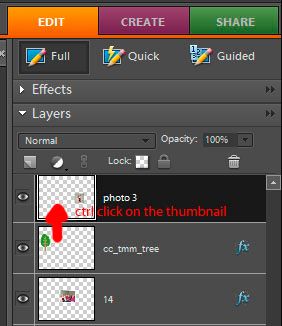
Now that you're on the photo layer, you will want to make a selection of your photo. To make your selection, hold down the control key and click on the thumbnail image of that layer in the layers palette as the arrow in the above image shows. That will put marching ants around your photo.
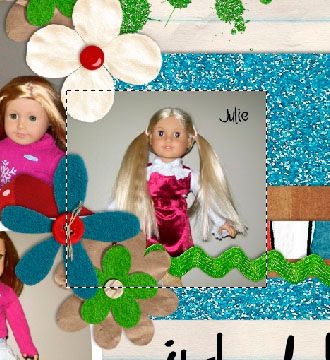
Let's talk a little bit about the stroke command. It will use the foreground color to put an outline around your selection. This is how we will make our photo mat. To access the stroke command, you will click on Edit, Stroke (outline selection) as shown in the image below.
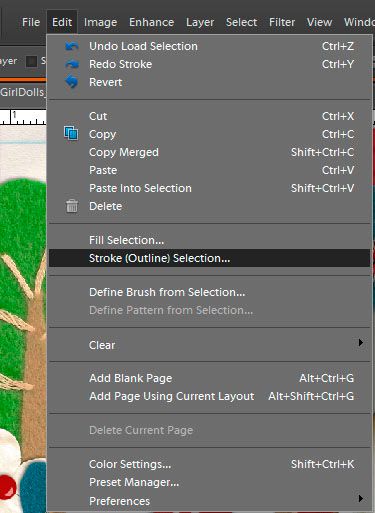
A pop-up dialog will come up and you will want to input the following:
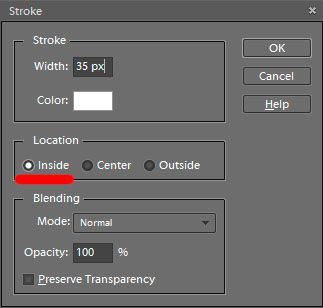
The width determines how big your mat will be. I usually go with 25 or 35 px - depending on how big my photo is.
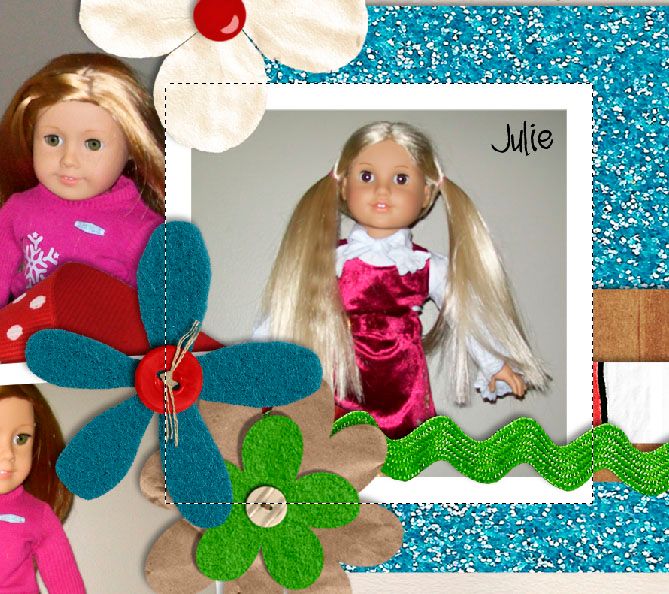
The Location is another important part of the stroke command. It determines where or how your selection will be outlined. I like to use the INSIDE LOCATION, because it makes my corners crisp and pointed. You can see that the outline stays inside the marching ants when I use the inside location, and the corners stay nice and pointed.
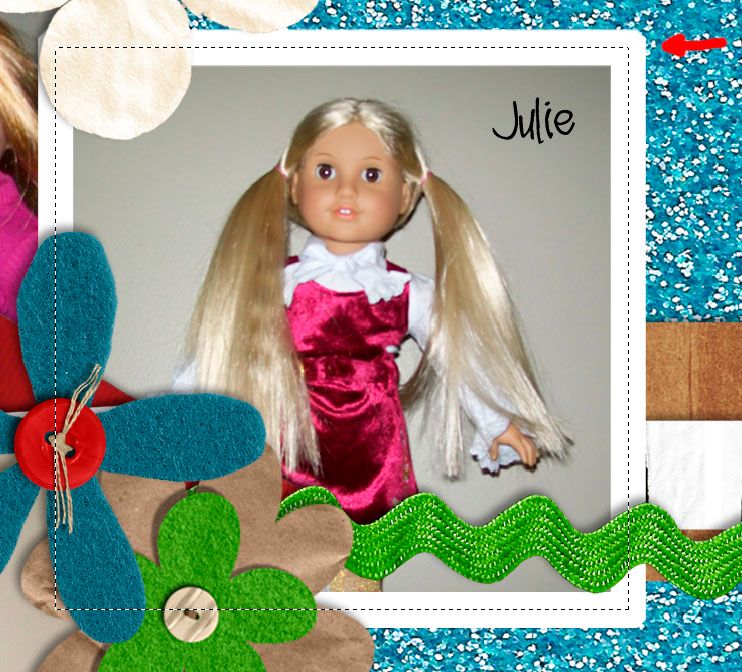
If I use the the Center location, the outline is placed half inside the marching ants and half outside of the marching ants. Notice too, how it makes the outside corners of the photo a little rounded.
If I use the Outside location, the outline is placed completely outside of the marching ants. It also cuts the corners.
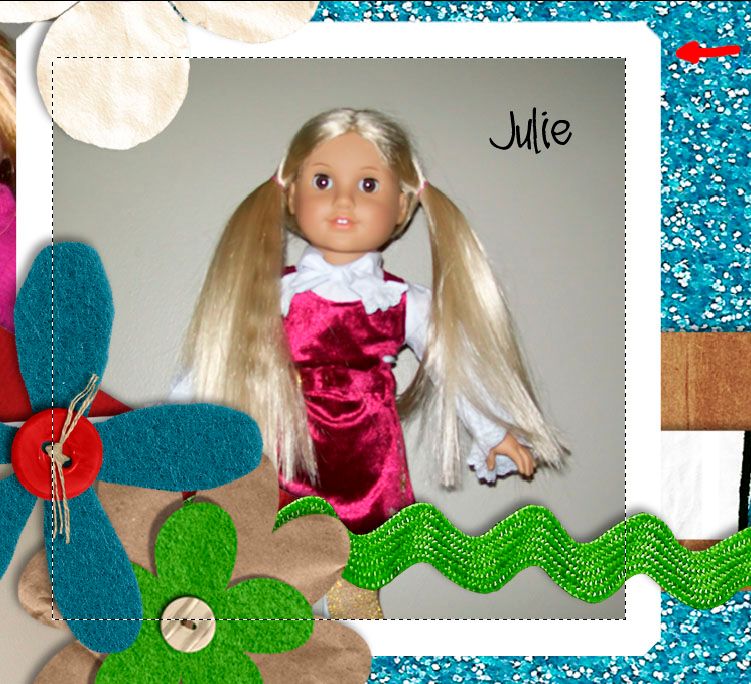
Now that you know what each location does to the corners of your outline, it's up to you to chose which look you like best for your layout.
Once you've added your stroke outline to your photo layer, you can hit control plus d to deselect the photo and turn off the marching ants. Now, it's time to add your shadows and finish up the layout.
The stroke command is very useful and can be used for more than just photo mats. One idea is that you can add an outline to any shape, or alpha to make it look like a sticker. The possibilities are endless, so have fun playing with the stroke command, and come back next week for another How to that will help take your scrappin to the next level.
Here's my finished layout.

It uses Chelle's Tell Me More kit which is only available in her upcoming Tell Me More Journaling Class in January 2011.

Well, that's it for today. Take care and as always keepscrappin!
p.s. Watch your Chelle's Creations newsletters for a special discount code for the journaling class. **wink** You can sign up for free in the box on the right side of this blog.


No comments:
Post a Comment