

Cara (aka colson) here today with a "How To" tip. Recently I was working on a layout and it spoke to me – does that ever happen to you? – and I needed a photo mask to make it work. And although the kit I was working with had absolutely everything I could possibly want for my layout, it didn’t have a photo mask. So, I was off to teach myself how to make one. Here’s the steps I used to create my own. I hope that you will give it a try as well. Now there may very well be quicker or even better ways to create a photo mask, but that’s what’s great about Photoshop – there’s always more than one way!
I’ll start with a blank canvas and use the “D” shortcut to reset my colors to default (black and white). I will make the general shape that I want my finished mask to be. You can make it rectangular, square, circular, oval or any random shape. For this demonstration, I’ll make a square mask so I’ll choose the Rectangle tool and make a black square.
Now, I didn't do it in this example, but you could add Feathered pixels so you have a softer outline.
Next (this is where the magic is!), you’ll choose brushes that carry the same theme of your photo or layout – or just pick ones you like. If you don’t have many brushes in your toolbox, check out sites like myphotoshopbrushes.com and brusheezy.com for some fantastic free brushes. Select the Brush tool and choose a 250-300 pixel compact brush that will work with your theme. Then go crazy painting with it to “hide” the square so it has a more organic feel. Don’t worry that you used a single brush here – we’ll fix that in a bit. Here’s what my square looks like after going crazy with one brush – and I “stamped” it singly off to the side so you could see what I used.

Now we’ll add some flair - I’m going to make a springtime/floral-themed mask, so I’ll choose some brushes of that type. Here’s my square after adding some floral brushes to the outer edges. Notice there are some tendrils – these add some definite interest, but keep in mind that your photo will need to extend that far. (Tip: sometimes it helps to have your photo in mind before creating a custom mask.)
Sometimes, depending on your brush and how your mask is looking, you may need to flip your canvas to make it look right.
You may also want to change the opacity of your brush if you want it to blend into your background paper. I recommend for the best results, starting with a 100% opacity brush, then filling in with brushes at 50-60% opacity – whatever you’re happy with.
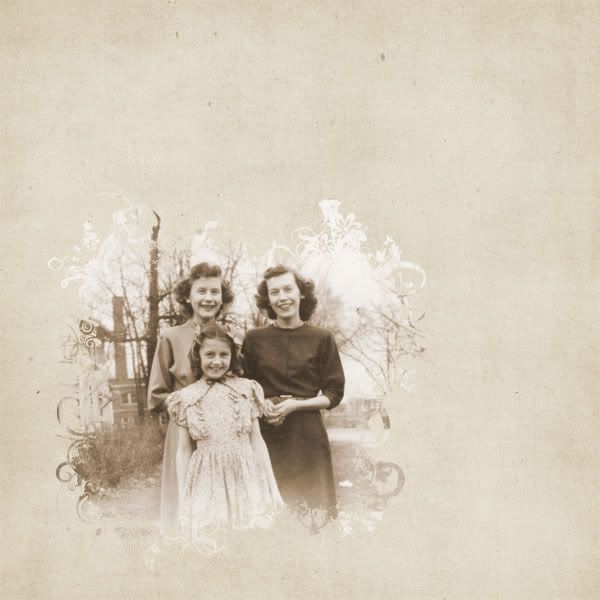
It may take a little time to get it just right (the Undo button is my best friend!) but soon you’ll be a mask-making pro! And here’s my final mask with a picture of my mom and her sisters from 1946 – a nice jumping off point for a layout.
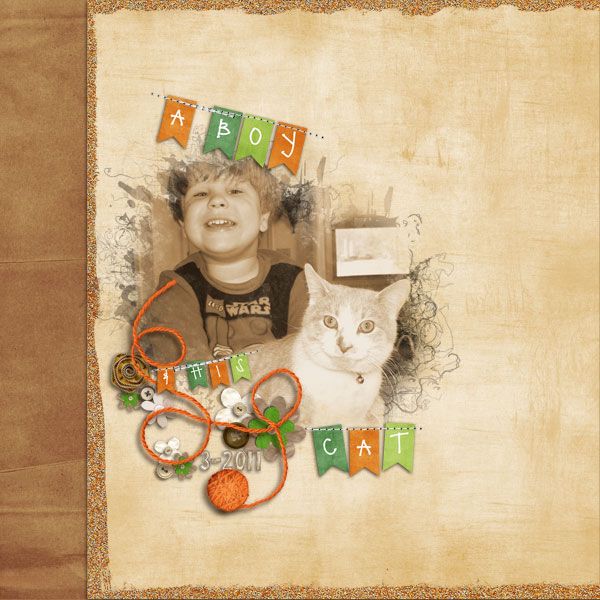
Here’s the layout that inspired this tutorial (using Chelle’s kits: Tell Me More, Here Kitty Kitty, Blessings, and Festival Alpha).
I hope you give this technique a try!! It's really a lot of fun and is great for customizing the feel of your layouts. Link up your creations here so we can come give you some love!!


Awesome tutorial Cara. I too love that there are so many ways to do things in PS. I hadn't thought of some of the things you said, so I'm so glad you shared your way of doing masks with us. WTG!
ReplyDeleteHi Cara,
ReplyDeleteThank you to YOU and your very talented creative team members for the wonderful tutorials you share each week. I can't tell you how much I appreciate these. They are so very helpful to those of us who are just learning PS. Thanks again.
Beautiful! I love these tutorials.
ReplyDelete